
|

|

|

|
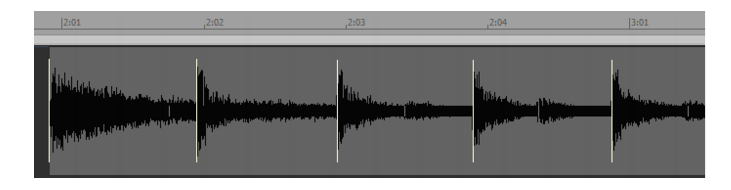
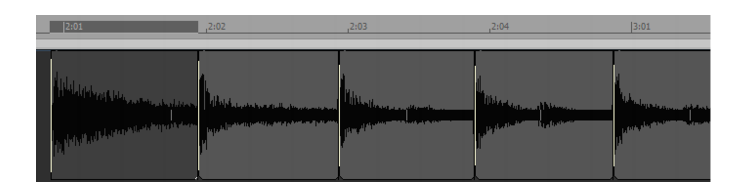
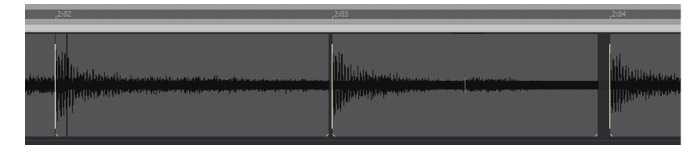
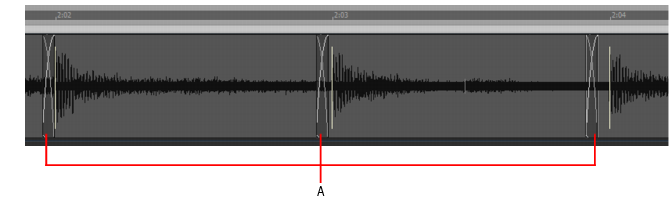
Clicking the Split Beats Into Clips buttonon the AudioSnap palette splits a selected AudioSnap-enabled clip into new clips starting at every enabled transient marker. The main reason you might want to do this is to align a clip with a new tempo or quantize it, without stretching the audio. Once you split a clip at its transients, you can move the new clips by dragging or quantizing so that they are aligned the way you want them to be. The advantage is that moving clips instead of transient markers does not stretch any audio, so that the original sound quality is unchanged. The possible disadvantage is that you can create gaps between the new clips when you move them. However, the Quantize, Groove Quantize, and Fade Selected Clips dialogs all have an option to automatically fill in the gaps. This is the Fill Gaps, XFade between Audio Clips option in the Fade Selected Clips dialog box, and is the Auto XFade Audio Clips option in the Quantize and Groove Quantize dialogs. Filling the gaps is accomplished automatically by “rolling out” the first clip’s right edge and the second clip’s left edge to create a crossfade. This option will often be used when quantizing drum parts, which results in smooth-sounding audio without introducing phase problems.
to split clips at audio beats.
on the AudioSnap palette.


Tip - Searching Documentation
Tip: To search for a specific topic, type your search query in the Search Cakewalk.com field at the top right of this page.
When the search results appear, click which product's documentation you would like to search to filter the search results further.
Note - Using Offline Help
Note: If you prefer to always use offline Help, go to Edit > Preferences > File > Advanced in your Cakewalk software and select Always Use Offline Help.
If you are not connected to the internet, your Cakewalk software will default to showing offline help until an internet connection becomes available.