Cakewalk // Documentation // SONAR // Patch points (Platinum and Professional only)
Table of Contents Previous Next Index

Mixing ► Patch points (Platinum and Professional only)

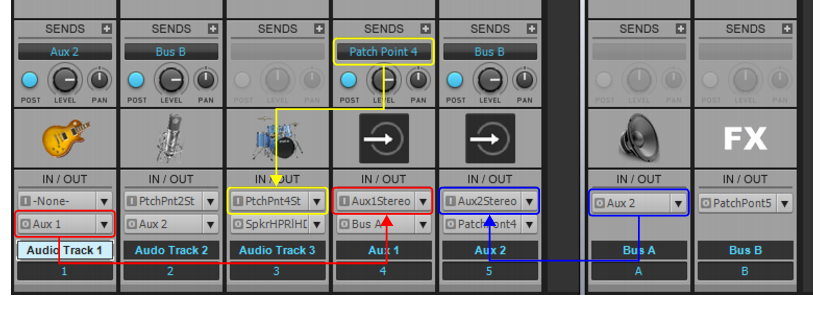
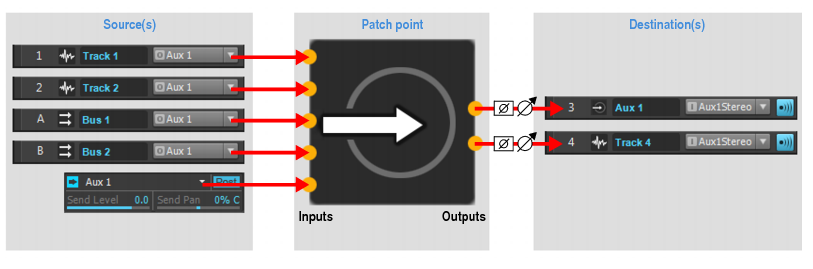
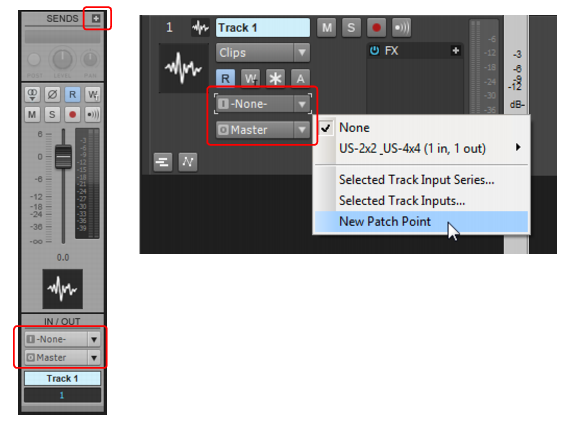
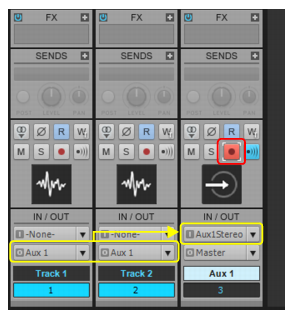
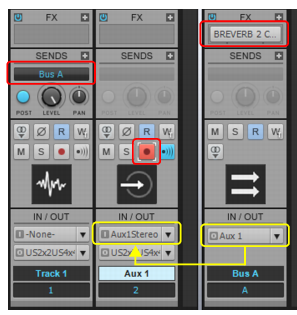
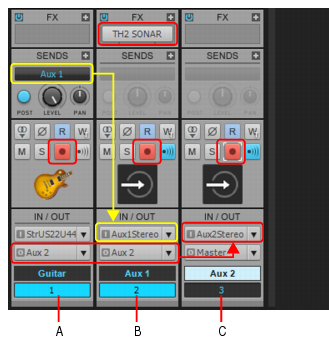
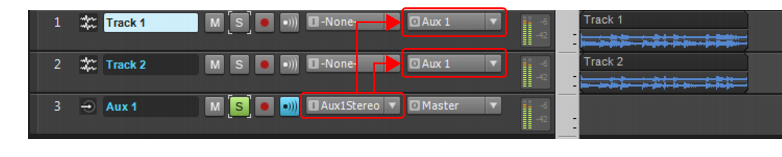
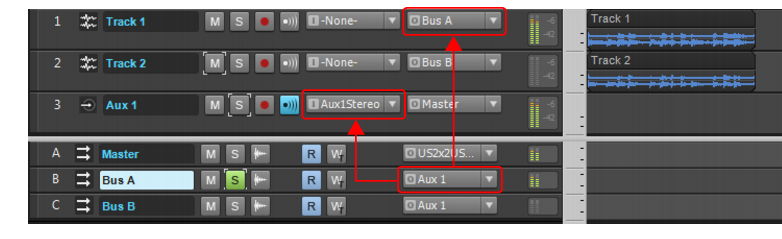
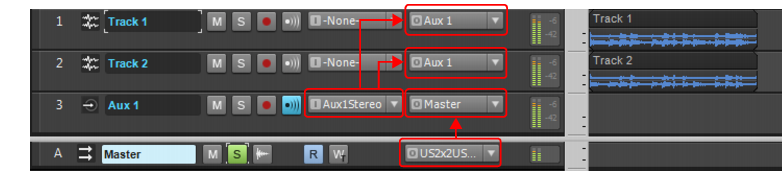
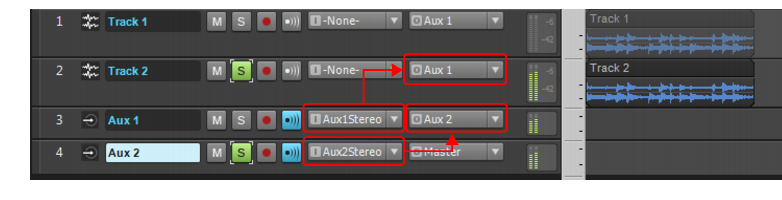
A patch point is an internal routing path used to route audio from a track output, bus output, or send to an audio track input. The virtual inputs can then be input monitored or recorded. You can think of patch points as virtual patch cables.
The New Aux Track command functions as a time-saving macro. When you create a new Aux track, SONAR does the following automatically:
*
Creates a new patch point named Aux n (where “n” is a sequential number).
*
Creates a new audio track named Aux n (same name as the patch point). If you rename the Aux track, SONAR will automatically rename the corresponding patch point.
Figure 370. Aux track
A. Audio track B. Aux track C. Input Echo enabled D. Aux track icon E. Assigned patch point 
Do one of the following:
*
*
Click an audio track Input control and select New Patch Point on the pop-up menu.
*
Right-click track or bus and select Insert Send > New Patch Point.
*
Click the Insert Send button 
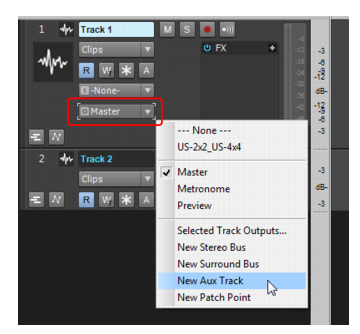
at the top of the Sends module in the Console view or Inspector, then select New Patch Point on the pop-up menu.
Do one of the following:
Click the Input, Output, or Send control you want to clear, then select None on the pop-up menu. You can also select a hardware input/output or bus to clear the current patch point assignment.
2.
2.
Hold down the CTRL key while you click the Output control on any of the selected tracks, then select New Aux Track on the pop-up menu. All selected tracks are assigned to the new Aux track. For more information about Quick Groups, see Quick Groups.
1.
Right-click the audio track and select Insert Send > New Stereo Bus on the pop-up menu.
3.
Click the bus’ Output control and select New Aux Track on the pop-up menu.
1.
Go to Insert > Stereo Bus to create a new bus for the audio metronome.
2.
3.
Go to Edit > Preferences > Project - Metronome.
4.
Select the Recording check box and clear the Playback check box (you will hear the recorded metronome instead during playback).
5.
Select Use Audio Metronome.
6.
Click the Output drop-down menu and select the bus named Metronome, then click OK to close the Preferences dialog box.
7.
Click the Metronome bus’ Output control and select New Aux Track on the pop-up menu.
Note: If you do not see the Input control, click the Track Control button at the top of the Track pane and choose All. For more information, see Configuring Track view controls. Also, make sure you have expanded the track fully by dragging it down.
2.
Hold down the CTRL key while you click the Output control on any of the selected tracks, then select New Aux Track on the pop-up menu. All selected tracks are assigned to the new Aux track. For more information about Quick Groups, see Quick Groups.
3.
Make sure the Input Echo button is enabled on the Aux track.
4.
Enable the Automation Write button on the Aux track.
1.
Go to Edit > Preferences > Project - Record and select Group All Clips under Multi-track grouping.
2.
Right-click the Guitar track and select Insert Send > New Aux Track on the pop-up menu.
5.
Hold down the CTRL key while you click the Output control on either of the selected tracks, then select New Aux Track on the pop-up menu. Both the Guitar track and Aux tracks are assigned to the new Aux track. For more information about Quick Groups, see Quick Groups.
A. Dry guitar B. Wet guitar (effects only) C. Blend of dry and wet guitar 
Copyright © 2024 Cakewalk, Inc. All rights reserved
Sitemap | Privacy Policy | Legal