Cleaning up that vinyl with pyro 2003
Last updated on 3/31/2016Looking for an all-in-one program to record, edit, EQ, remove vinyl noise, pops and clicks? How about a program that can do all the above that was designed from the ground up for musicians by musicians?
Getting started
Let's first take a look at the pyro 2003 interface:
After we have familiarized ourselves with the interface, we will need to make the connections to the computer.
Recording from a Turntable: Selecting outputs on your stereo
Nearly every stereo has at least one stereo pair of outputs (we'll call them jacks from here on out) you can use for recording. They usually are RCA outputs (the standard type used to connect your stereo components) RCA jacks look like this:
RCA jacks are always color coded in white and red or black and red. Red is always the right channel. Any of the following RCA jacks are acceptable for sending signal to your PC:
- Tape Out--usually connected to your cassette deck.
- Tape 2--a second tape deck output.
- Aux Out--an all-purpose output.
- Zone 2, 3 etc.--used for multiple room setups.
- And others (CDR, Video), consult your stereo's documentation if you have any questions.
Now that you've found the output jacks on your stereo, let's select the right cables and adapter.
Recording from a Turntable: Selecting your cables and adapter
You need the following:
- A pair of RCA cables
- A Y-adapter: 2 RCA jacks to 1 1/8" stereo plug
Follow this procedure:
1. Plug the cables into the RCA jacks you have chosen to use on your stereo.
2. Plug the other end of the RCA cables into the RCA end of the Y-adapter.
Note: If you have a "professional" sound card, you will need to get two RCA to 1/4" mono phone plug adapters.
The Windows Mixer
The Windows Mixer controls the volume levels of your sound card inputs, and it also can mute any input or output.
To open the Windows Mixer, click the Open Windows Mixer button at the bottom of this dialog.
The Windows Mixer looks like this:
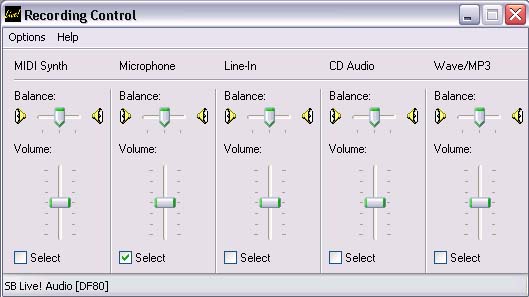
When you open the Windows Mixer it may be labeled Play Control or Recording Control. We want to see the Recording Controls.
To view the Recording Controls:
1. Click the Options menu and select Properties.
2. The Properties dialog appears.
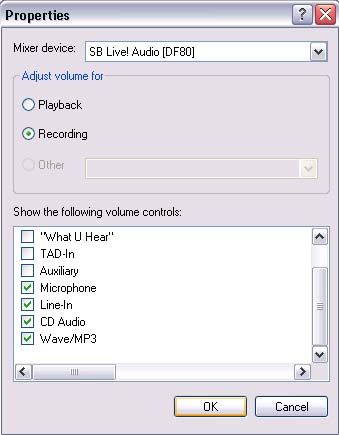
3. In the Adjust Volume For section of the Properties dialog, select the Recording radio button.
4. In the Show the Following Volume Controls section, the Line-in and Microphone options should be checked. If they are not, check them.
5. Click OK.
6. The Recording Controls now appear in the Windows Mixer.
7. Check the input you want to use, either Line In or Microphone.
Selecting an input:
Unless you are using a microphone, you should use the Line In. If you are using a Microphone, use the Microphone input. Make sure you are selecting the input that you are connected to. If you are unsure which input to select, consult your sound card's documentation
Beginning to record.
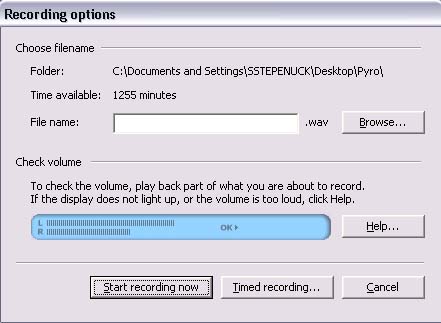
1. Click the record button in pyro.
2. Enter in a name and directory (folder) for your recording.
3. Check the input level until you at least reach the 'OK' point.
4. Click "Start Recording Now".
5. Click "Stop recording".

Editing the recording:
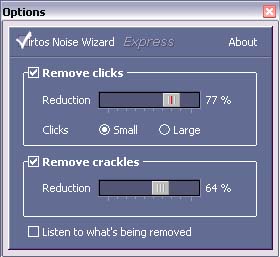
1. We can use the De-click module to reduce clicks and pops in the recording.
a. Adjust the parameters by selecting "Listen to what's being removed"
b. Adjust as needed.
c. Un-check "Listen to what's being removed"
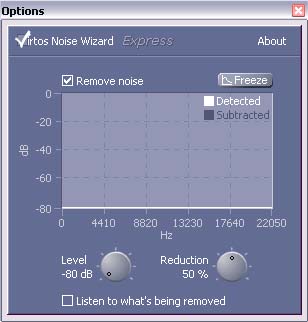
2. We can now use the Noise Wizard module to reduce background noise.
a. Adjust the parameters by selecting "Listen to what's being removed"
b. Adjust as needed. Be sure to listen for any"music" while auditioning. If you can hear any, you are using too much reduction.
c. Un-check "Listen to what's being removed"
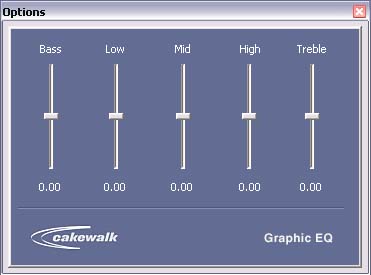
If overused, the above processes can remove some of the high frequency content in a track. You can use the Graphic EQ to compensate for this.
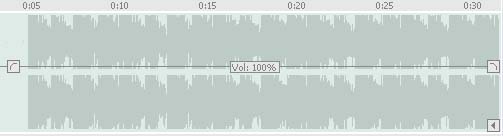
3. Finally, to adjust the level of the overall track, you can use the volume handle to visually raise and lower the tracks volume.
You can now burn your track onto CD to have a clean, digital version of your mixes.
Below are some demo mp3 files demonstrating pyro 2003's editing abilities.