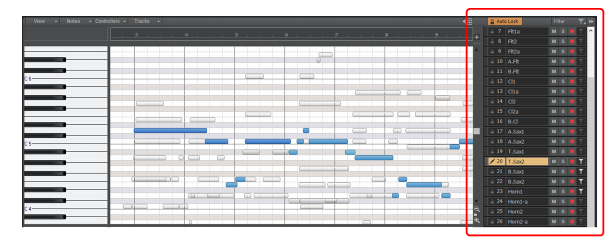
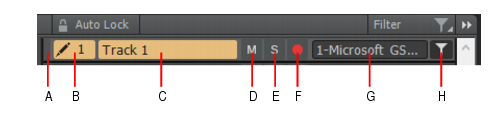
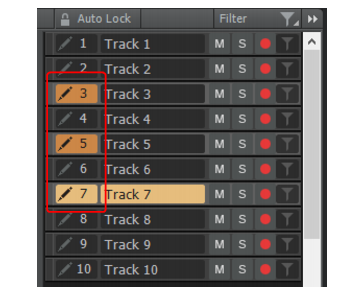
Cakewalk // Documentation // SONAR // Streamlined Track pane
Table of Contents Previous Next Index

New featuresPiano Roll enhancements ► Streamlined Track pane

Figure 19. Track pane.
Note: The Track pane replaces the obsolete Tracks menu in the Piano Roll view in earlier versions of SONAR, along with the corresponding Pick Tracks, Show Next track, and Show Previous track commands.
*
Click the Expand/Collapse button in the Piano Roll view.
*
Click the Piano Roll view View menu and select Show/Hide Track Pane.
Tip: You can right-click the Expand/Collapse button to cycle through different sizes.
A. Auto Lock B. Track Filter C. Expand/collapse 
*
Auto Lock (Professional and Platinum only). When enabled, events from all selected tracks are displayed, but only the focused track can be edited. All other tracks are automatically locked. When disabled, events in all selected tracks can be edited. For details, see Auto Lock mode (Professional and Platinum only) and To show events in multiple tracks.
*
Filter (Professional and Platinum only). The track filter determines which tracks are listed in the Track pane, while track selection determines which tracks show data in the edit view. Add individual tracks to the filter, then click the Filter button to list only those tracks. For details, see Filter mode (Professional and Platinum only).
Right-click the Filter button to access the following menu commands:
*
New (Platinum only). Save the current track filter assignments as a preset. Track filter presets are saved per project.
*
Save (Platinum only). Save changes to the current track filter preset.
*
Rename (Platinum only). Rename the current track filter preset.
*
Delete (Platinum only). Delete the current track filter preset.
*
Add All Tracks. Add all tracks to the filter.
*
Remove All Tracks. Remove all tracks from the filter (and disable the filter, if active).
*
Default (Platinum only). The default filter when the track filter is disabled.
*
<List of filter presets> (Platinum only). List of the current project’s track filter presets.
*
Expand/Collapse Track pane. Show or hide the Track pane. Right-click to cycle through different sizes.
A. Custom track color B. Select track for editing C. Track name D. Mute E. Solo F. Arm for recording G. Output H. Add track to filter 
*
Track color. The color of Note events in the track. Similar to the Track view, only custom colors are shown, not default colors. For details, see Customizing track/bus colors.
*
Select track for editing. Tracks that can be edited show a highlighted draw icon 
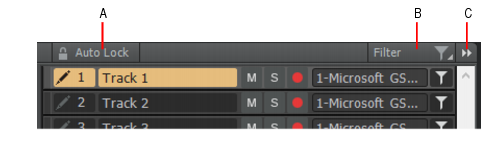
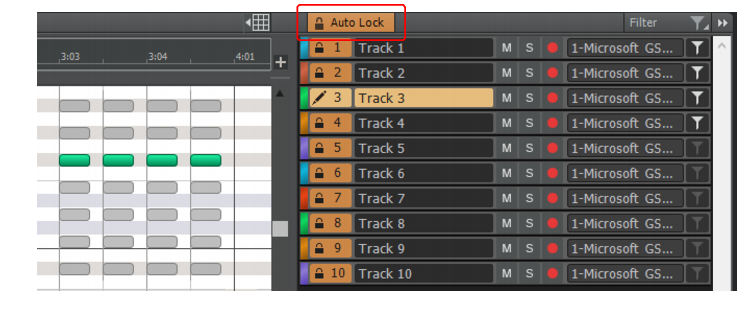
, and the focused track name is highlighted. When Auto Lock mode is enabled, tracks that are locked show a lock icon .
*
Track name. The track’s name. Click a track’s name to give it focus for editing.
*
Mute. Mute/unmute the track.
*
Solo. Solo/unsolo the track.
*
Arm for recording. Arm/disarm the track for recording.
*
Output. The track’s MIDI output or instrument assignment.
*
Add to track filter. Adds the track to the track filter. Tracks that have been added to the track filter show a white filter icon 
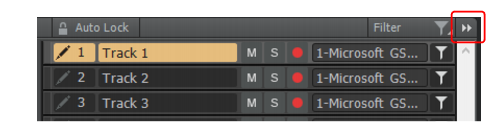
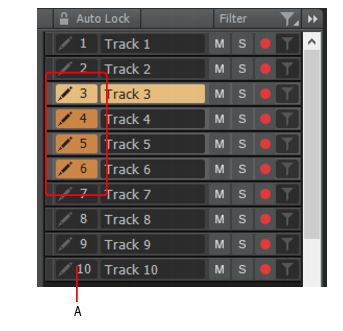
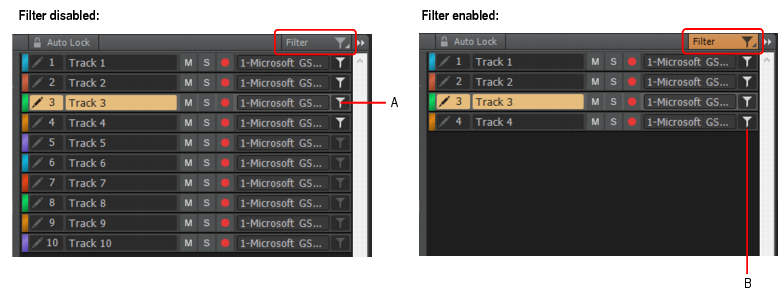
. When you enable the Filter button, only tracks that have been added to the filter will be listed in the Track pane. To remove a track from the filter, click the filter icon again. For details, see Filter mode (Professional and Platinum only).
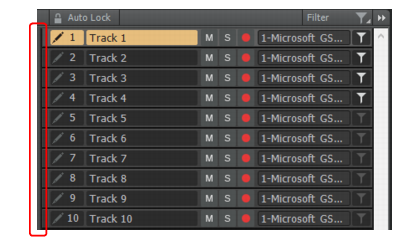
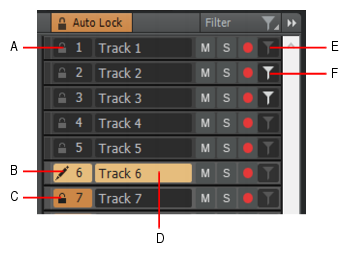
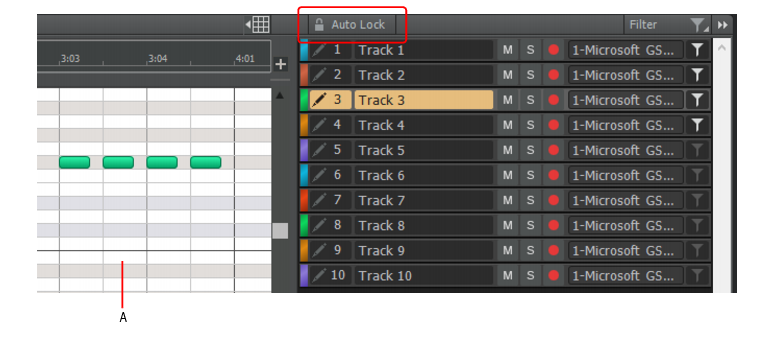
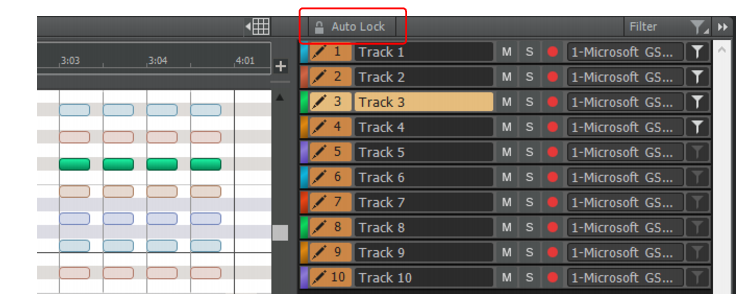
A. Track editing disabled B. Track editing enabled C. Track auto locked D. Focused track E. Track not added to filter F. Track added to filter 
A. Events in all selected tracks are visible, but only the focused track can be edited 
To switch track focus, do one of the following:
To enable the default mode, make sure the Auto Lock button is disabled.
*
To select a range of adjacent tracks. Do one of the following:
A. Click in this column to select tracks in the Track pane 
*
To select discontiguous tracks. Hold down the CTRL key and click the tracks you want to select. Holding down the CTRL key while you click also lets you toggle the selection status of a track.
*
To select all tracks. Double-click any track’s Select track for editing button .
*
To clear the current selection. Click any track’s Select track for editing button .
Figure 22. Filter mode.
A. Add track to filter B. The Track pane only shows tracks that have been added to the active filter 
*
To add a track to the filter. Click the track’s Add track to filter button until it shows a white filter icon . To remove a track from the filter, click the filter icon again. When you enable the Filter button in the Track pane header, only tracks that have been added to the filter will be visible.
*
To open the Filter menu. Do one of the following:
*
Right-click the Filter button.
*
Click the Filter button and keep the mouse button pressed for a brief moment.
*
[Platinum only] To save the current filter assignments as a new preset. Right-click the Filter button and select New on the pop-up menu.
*
[Platinum only] To save changes to the current filter. Right-click the Filter button and select Save on the pop-up menu.
*
[Platinum only] To select a track filter preset. Right-click the Filter button and select the desired preset on the pop-up menu.
*
[Platinum only] To delete the selected track filter preset. Right-click the Filter button and select Delete on the pop-up menu.
*
[Platinum only] To rename the selected track filter preset. Right-click the Filter button and select Rename on the pop-up menu.
*
To add all tracks to the filter. Right-click the Filter button and select Add All Tracks on the pop-up menu.
*
To remove all tracks from the filter (and disable the filter, if active). Right-click the Filter button and select Remove All Tracks on the pop-up menu.
Note: The Auto Lock button can only be enabled and disabled when multiple tracks are selected in the Track pane.
Copyright © 2024 Cakewalk, Inc. All rights reserved
Sitemap | Privacy Policy | Legal